Gatsby has become fairly popular in the last couple of years and it has starting becoming the go to static site generator for a lot of projects. The smooth developer experience and the warm community has enriched the adoption even more. TypeScript has had a similar growth curve and has risen to popularity too.
It makes sense to use TypeScript along with Gatsby for your projects, and this post will walk you through the setup process for integrating the two together. But first, for the people who do not know what Gatsby is, let us discuss that.
What is Gatsby?
For those who do not know anything about Gatsby, it is a static site generator that makes use of the latest web technologies, and is powered by React and GraphQL.
It takes all the best parts of React, Webpack, routing, GraphQL, and puts them together to create an enjoyable developer experience.
The term static site generator might be a bit off-putting, but Gatsby has far more capabilities than traditional static site generators.
What makes Gatsby special?
While the developer experience is the biggest selling point for Gatsby, it has other benefits too.
- There is a minimalistic configuration involved to set up Gatsby. This also makes it a beginner-friendly project.
- There are plugins that have been built by the community to help you avoid reinventing the wheel. The rich Gatsby ecosystem also assists in the form of great documentation and a lot of starter kits to kick things off quickly.
- The data layer is a GraphQL powered layer that allows you to collect data from a variety of different sources: markdown files, CMS, APIs, or even JSON. Gatbsy will create an internal graph of all this data at build time, give it to your React components, render the HTML, and save that static HTML as the output.
- Gatsby is super performant and has been built keeping every aspect of performance in mind.
- Accessibility is emphasized in the product and having it as a built-in focus point is always a good to have.
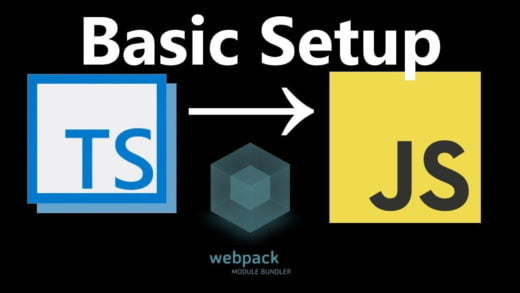
Let’s get started with a Gatsby Project and TypeScript integration!
Now let us get to the fun stuff! Let us create our own Gatsby project, we will then add TypeScript to it and then integrate ESLint in the setup.
Setting up Gatsby
For setting up Gatsby, we will need the Gatsby CLI. We can either use npx to run the Gatsby command mentioned below once if you want to. But since we are going to need it for other Gatsby related things, we can install it globally as well.
yarn global add gatsby-cliNext, we will use the installed Gatsby CLI to create a new site for us.
gatsby new gatsby-starter-blog-wisdomgeek https://github.com/gatsbyjs/gatsby-starter-defaultThe above command pulls all the files needed by us to get up and running with our Gatsby site along with some configuration files.
It is also worth noting that this is where the rich ecosystem comes into the picture as well. The URL that we used above is of the default starter but can be replaced with any other community-created starter. There is a huge list of starters that you can choose from according to your needs. To see a complete list of all the starters, you can visit this link.
The above command will create a folder named gatsby-starter-blog-wisdomgeek in our current directory and we will open it in our editor. Running the command yarn develop in this location will run our project. If we navigate to http://localhost:8000/ in our browser, we would see the Gatsby app up and running.
That command did all the configurations that were needed for us to be able to run Gatsby. Easy, wasn’t it?
Integrating TypeScript
As of a few days ago, Gatsby has integrated typescript support right inside the core ecosystem. Support for .ts and .tsx files others exists as of now, other features are still being baked in.
What this means is that we do not need to do any steps to configure Webpack or Babel for setting up TypeScript. If we were older versions of Gatsby, then also that would still not have been needed. We would have had to add a plugin called gatsby-plugin-typescript manually in the configuration in that case. But now that .ts and .tsx support is provided out of the box and that plugin is what gets used under the hood.
All we need to do for this step is convert all .js files in the project to the extension .tsx.
Once we are done with the conversion of files to .tsx, we need to introduce type checking and linting into the project. Before we get to that, we should add TypeSript as a developer dependency in our project. So we will run the command:
yarn add typescript --devWe will also add a .tsconfig file to set up some of the configuration values for TypeScript. To generate the default one, we will use the command:
npx tsc --initThis will generate a .tsconfig file in our folder.
We will change a couple of properties in it.
Firstly, we will uncomment the lines "sourceMap": true and "noEmit": true. These will ensure that source maps are enabled and the outputs are not be emitted by the TypeScript compiler. We can additionally uncomment the "noImplicitAny": true statement as well if we want to enforce stricter type checking.
Secondly, we will also add the line "skipLibCheck": true towards the end of the file to skip type checking of all declaration files (*.d.ts).
We will also add the types for all the libraries that we are using in our project to help us with type checking and intellisense:
yarn add @types/node @types/react @types/react-dom @types/react-helmet prettier --devEven though we will not be configuring the usage of prettier in this project, we have added it in here since we will be adding configuration related to it in our ESLint configuration for people that do use it.
Those are all the steps that we need to do to start using TypeScript. But we want to use the benefits of type checking in our project. For that, we need to setup type checking and linting in the project too. So we move on to the next step.
Setting up ESLint
This was a fairly easy step for me since I had done the setup of ESLint and TypeScript before as well. And setting up ESLint in a Gatsby project was similar to any other React project.
We will add the packages needed for ESLint:
yarn add @typescript-eslint/eslint-plugin @typescript-eslint/parser eslint eslint-config-prettier eslint-jsx-a11y eslint-plugin-react --devNow that we have all the packages we need, we will configure ESLint by creating a .eslintrc.js file.
module.exports = {
  parser: '@typescript-eslint/parser',
  parserOptions: {
    ecmaVersion: 2018,
    sourceType: 'module',
    ecmaFeatures: {
      jsx: true,
    },
  },
  plugins: ['@typescript-eslint', 'react', 'jsx-a11y'],
  env: {
    browser: true,
    node: true,
  },
  extends: [
    'eslint:recommended',
    'plugin:react/recommended',
    'plugin:@typescript-eslint/recommended',
    'plugin:jsx-a11y/recommended',
    'prettier',
    'prettier/react',
    'prettier/@typescript-eslint',
  ],
  settings: {
    react: {
      version: 'detect',
    },
  },
  rules: {
    'react/prop-types': 'off',
  },
};Understanding what the ESLint configuration options mean
We have set the TypeScript parser as the parser for our ESLint to ensure that it can understand TypeScript.
Then we have configured the parser options such as setting the ECMAScipt version to 2018 to enable us to use the latest features of the language. We have set the source type to modules since we will be using ES Modules in our project. To enable ESLint to understand jsx, we specify that in the parser options as well.
We then add the plugins for typescript, react and accessibility (jsx-a11y) to ESLint so that it knows that those are the third party rules that we want ESLint to enforce. We then specify which of these rules we want to use in the extends section of the configuration.
The env browser and node attributes make ESLint aware about the globals such as window and import. If these were not specified, ESLint would mark them as errors of undefined globals.
The 'react/prop-types': 'off' rule is us explicitly turning the prop types rule off since we are handling that part using TypeScript checks. If we did not do that, we would be specifying the type of props passed to react components twice which is something we do not want to do.
Setting up type checking
Now that we have everything in place, we will add the following scripts to our package.json:
"test": "npm run type-check && npm run lint",
"lint": "eslint . --ext .ts,.tsx",
"type-check": "tsc --pretty"The lint script runs ESLint on files with extensions .ts and .tsx
The type-check script runs the tsc compiler and returns all the warnings and errors it finds according to the the .tsconfig file configurations that we had mentioned.
We combine both of those into a single test script to run them both at once.
And that is all the set up that we need to have TypeScript up and running in our project. And once we run the test command, we will start finding TypeScipt errors in our project.
Fixing TypeScript errors in our starter project
Now that we have everything configured, we need to fix the errors that TS and ESLint have reported.
The major refactor that we will need to do to remove the errors that the linter is throwing would be to shift from prop types to TypeScript interfaces. For example, in the layout.tsx file, we will change it from:
const Header = ({ siteTitle }) => ( // definition)
Header.propTypes = {
  siteTitle: PropTypes.string,
}to
interface HeaderProps {
  siteTitle: string;
}
const Layout: React.FunctionComponent<HeaderProps> = ({
  siteTitle,
}) => (// definition)We will be doing the same change across all TypeScript files. This ensures that we have converted all source code to TypeScript interfaces. All the TS errors should be gone once these changes are made.
And Voila! Those would be the last set of changes that we would need to make! We now have a working Gatsby project configured using TypeScript and ESLint!
You can browse the files here to see what the complete project looks like.
Let us know in the comments section if you have any questions. Or if there is anything more that you would like added to this post.